The conventional tank water heater is an unsung workhorse, operating silently in the background 24 hours a day to provide modern comfort. However, because it is out of sight, it is frequently out of mind—until you are suddenly hit with a freezing shower or a flooded basement.
The average lifespan of a traditional tank water heater is 8 to 12 years. Replacing one typically costs between $1,200 and $3,000, depending on the unit size, fuel type, and local labor rates. By implementing a proactive annual maintenance routine, homeowners can easily maximize that lifespan, improve energy efficiency, and prevent catastrophic tank failures.
The Three Pillars of Water Heater Maintenance
Maintaining a conventional water heater (whether gas or electric) revolves around three critical tasks. Performing these once a year can add years to the life of your unit.
1. Flushing the Tank (Removing Sediment Buildup)
All municipal and well water contains dissolved minerals (calcium and magnesium). As water is heated inside the tank, these minerals precipitate out of the water and settle at the bottom as a thick, crusty sediment layer.
Why it matters: In gas water heaters, the burner is located at the bottom of the tank. A thick layer of sediment acts as an insulator, forcing the burner to run longer and hotter to heat the water above the sediment. This wastes energy, creates a popping or rumbling noise, and eventually overheats the metal, leading to a cracked glass lining and a ruptured tank. In electric heaters, sediment can bury and burn out the lower heating element.
How to flush:
- Turn off the power (flip the breaker for electric, turn the dial to "Pilot" for gas).
- Shut off the cold water inlet valve at the top of the tank.
- Attach a standard garden hose to the drain valve at the bottom of the tank and route the other end outside or into a floor drain.
- Open the drain valve and open a hot water faucet somewhere in the house (this breaks the vacuum).
- Let the tank drain completely. Briefly turn the cold water valve back on to stir up any remaining sludge, and let it drain until the water runs completely clear.
2. Inspecting the Anode Rod (The Sacrificial Lamb)
Inside every tank water heater is a long metal rod—usually made of magnesium, aluminum, or zinc—suspended in the water. This is the sacrificial anode rod. Because of galvanic corrosion, the highly reactive metals in the rod attract the corrosive elements in the water. The rod rusts away so that the steel walls of the water tank do not.
Why it matters: Once the anode rod is completely depleted (usually within 3 to 5 years, depending on water hardness), the corrosive elements immediately attack the steel tank. The tank will rapidly rust from the inside out and eventually rupture.
How to maintain:
- Check the rod every two to three years. It requires a socket wrench (usually 1-1/16 inch) to unscrew the hex head at the top of the tank.
- If the rod is heavily pitted, coated in a thick calcium paste, or if more than six inches of the core steel wire is exposed, it must be replaced. A new rod costs less than $50 and is the cheapest insurance policy against a premature tank replacement.
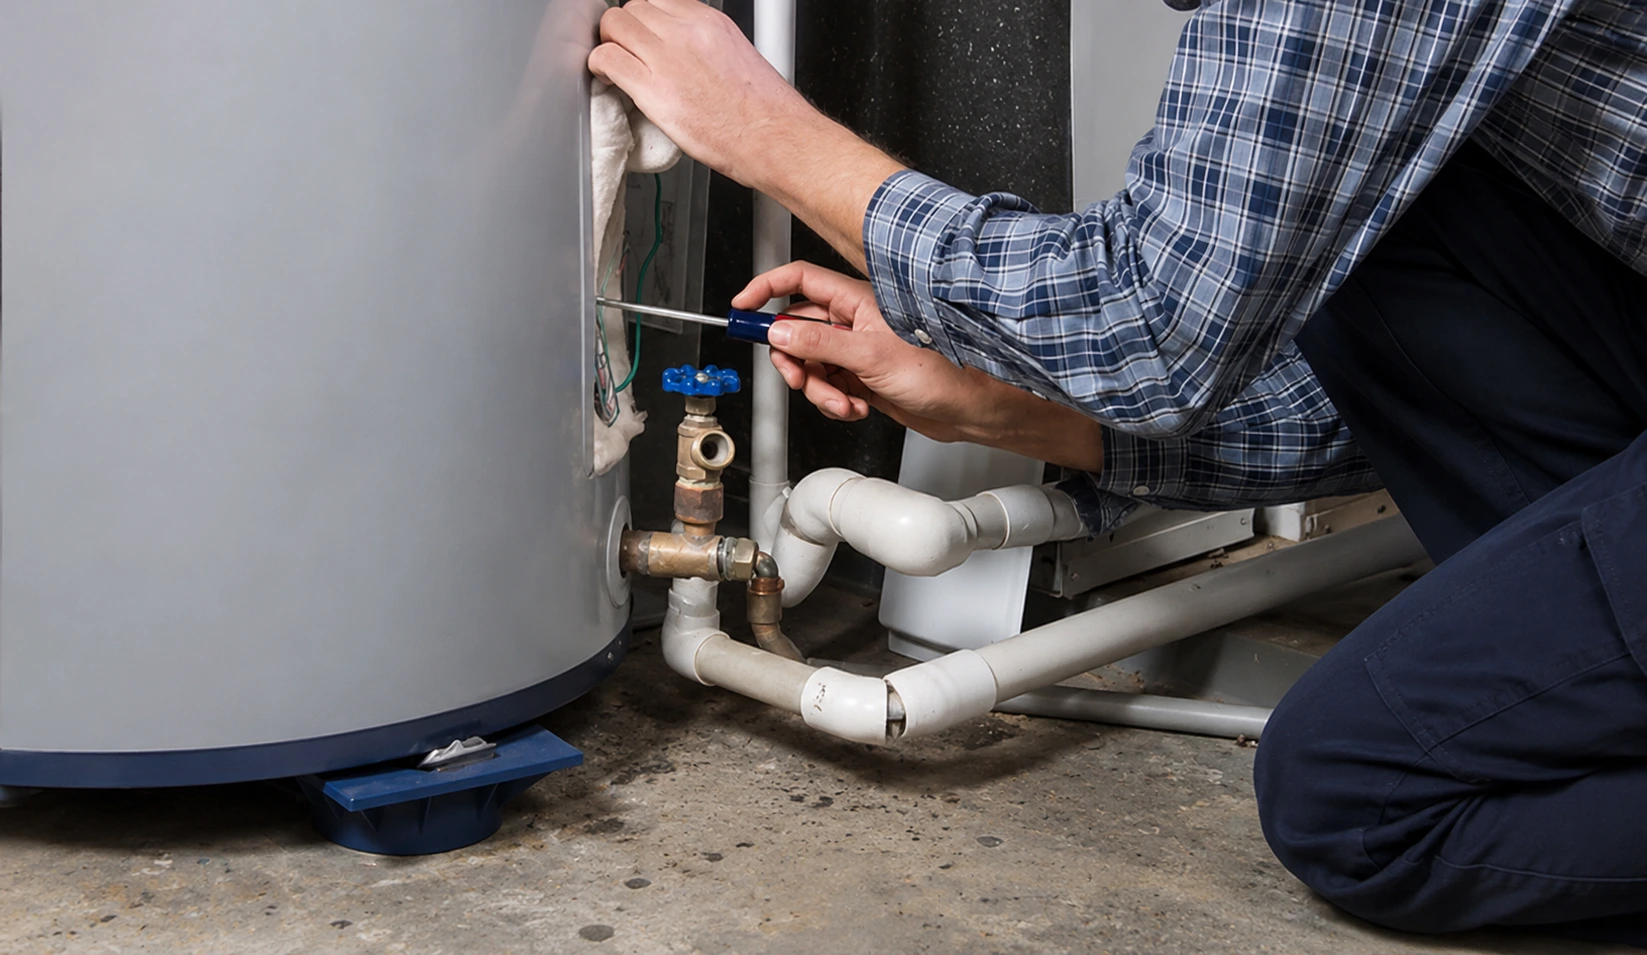
3. Testing the Temperature and Pressure Relief (TPR) Valve
The TPR valve is a vital safety mechanism located on the top or upper side of the tank. If the thermostat fails and the water boils, the pressure inside the tank can reach explosive levels. The TPR valve is designed to open automatically and release water if the temperature exceeds 210°F or the pressure exceeds 150 psi.
Why it matters: If a TPR valve seizes shut due to mineral scaling, a runaway water heater can literally explode with enough force to level a home.
How to test:
- Place a bucket under the discharge pipe connected to the TPR valve.
- Gently lift the brass lever on the valve. It should release a brief burst of hot water into the bucket and shut off completely when you let go.
- If no water comes out, or if the valve continues to weep after you release the lever, the valve is defective and must be replaced by a plumber immediately.
When to Call a Professional
While flushing and testing can be DIY tasks for handy homeowners, certain water heater issues demand a licensed professional:
- Gas Supply Issues: If your pilot light continually goes out, or if you smell gas (a rotten egg odor) near the unit, shut off the gas valve immediately and call a plumber. Do not attempt to repair thermocouples or gas control valves yourself.
- Electrical Failures: If your electric heater repeatedly trips the circuit breaker, it indicates a short circuit, a burnt-out element, or a failing thermostat that requires electrical diagnostics.
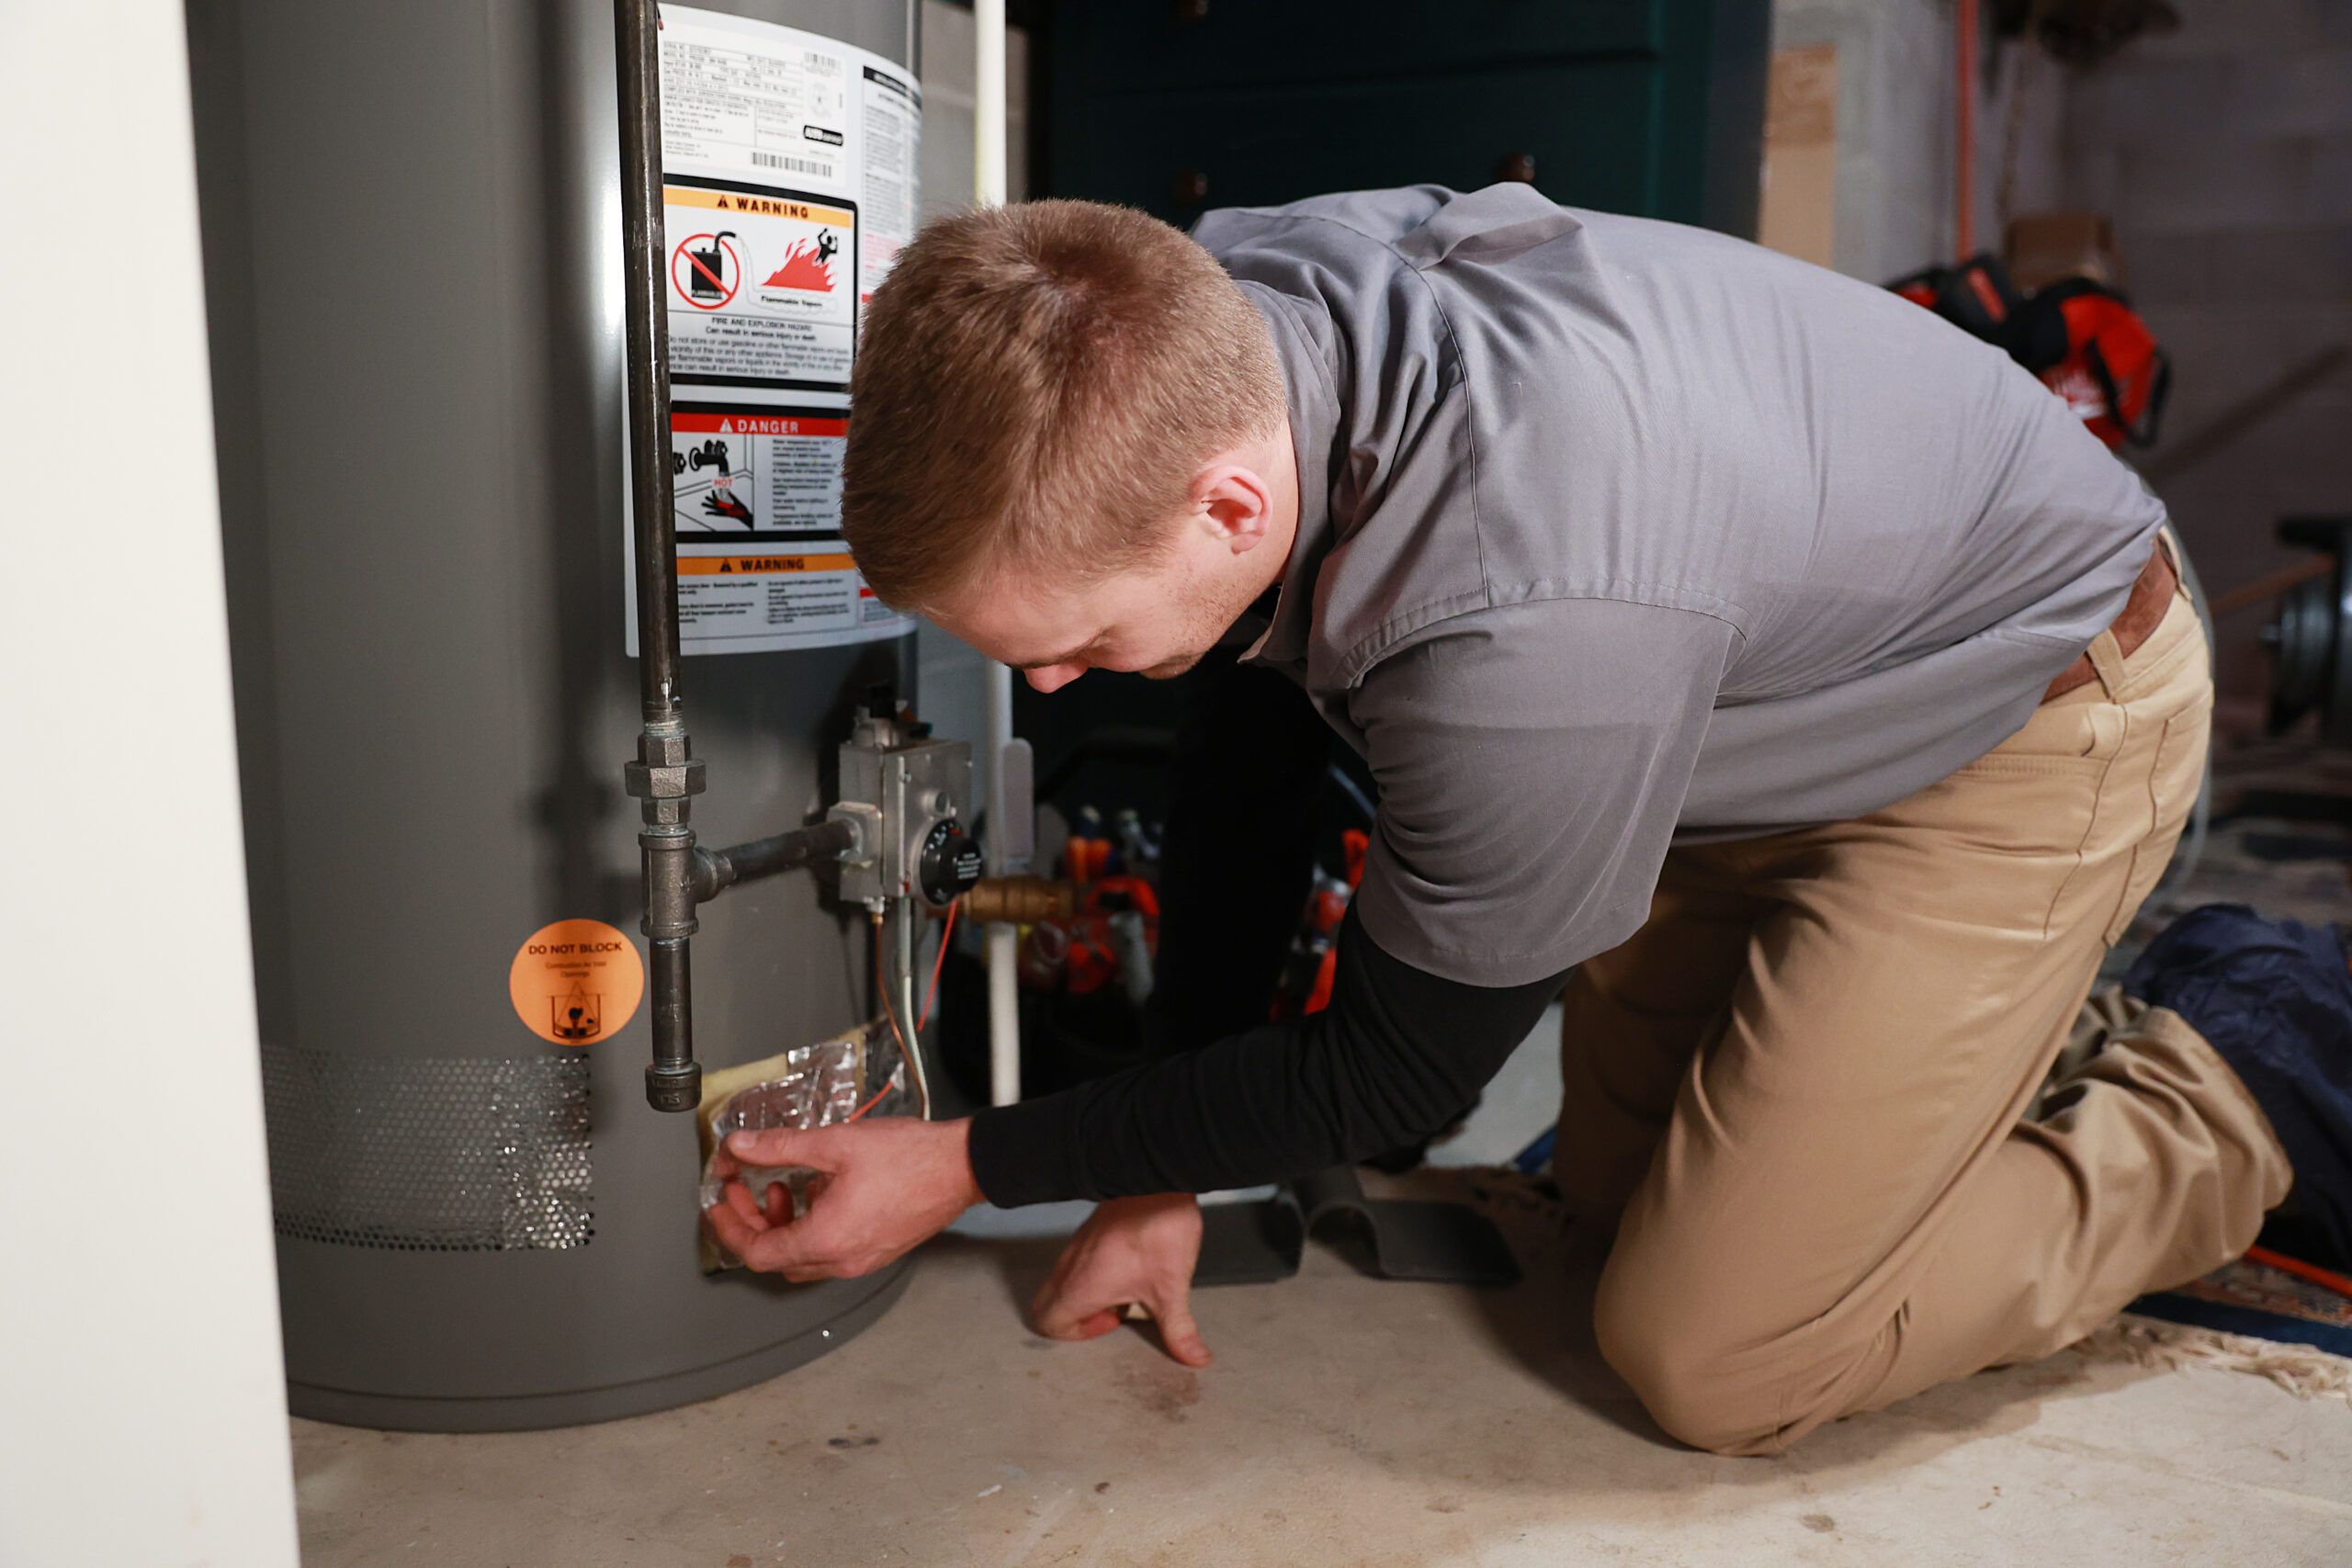
- Active Tank Leaks: If water is pooling at the base of the tank (and it is not coming from a loose plumbing connection or the TPR valve), the inner steel tank has fractured. There is no way to patch or repair a ruptured internal tank; the unit must be replaced immediately before it causes catastrophic water damage.
Regular maintenance is the dividing line between a water heater that fails prematurely and one that efficiently provides hot water for over a decade. By dedicating just one hour a year to these basic protocols, you protect your home and your wallet.